Friday, December 14, 2012

Chocolate Cherry English Muffins for #Baketogether

Chocolate Cherry English Muffin
A Zingerman’s catalog arrived around the time I was thinking about how to adapt Abby Dodge’s November #Baketogether recipe for English  muffins. My husband and I truly miss this Ann Arbor destination now that we’ve moved considerably further afield. We’ve spent many a happy hour standing in line to purchase sandwiches, cheeses and all manner of baked goods.

Among the many things I appreciate about Zingerman’s is its sincere pursuit of consistent quality. There isn’t an off day for any item—bread, kugel or cheese. And rarely do you find an off day for the employees. Zingerman’s hires carefully and trains well. The customer service is so good, in fact, the company operates a little branch of corporate training.

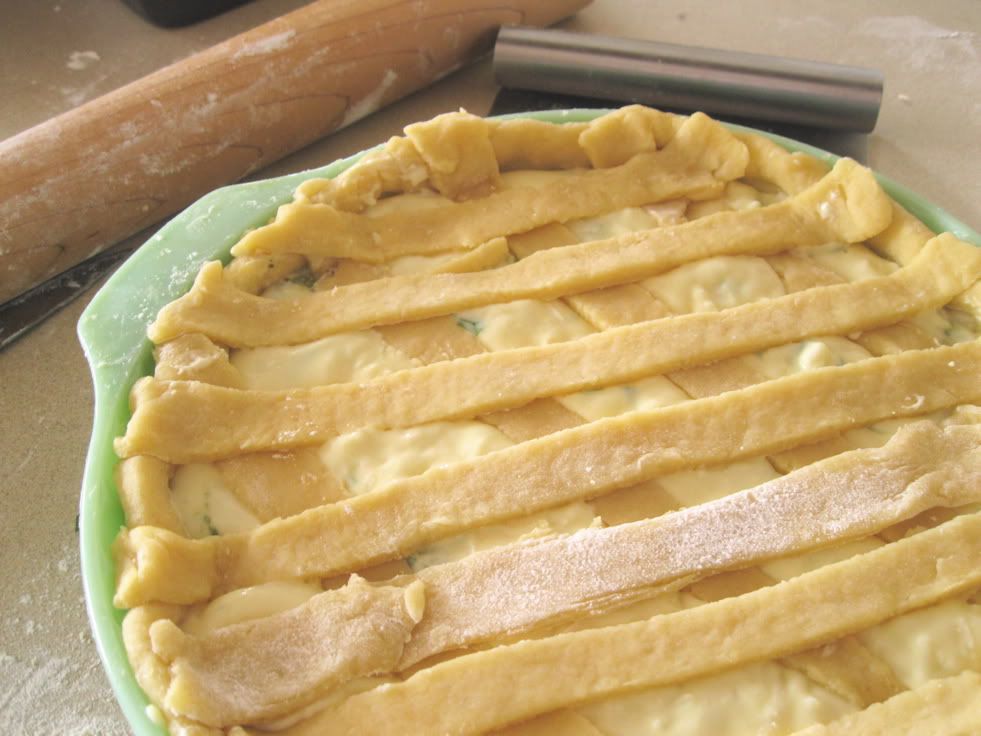
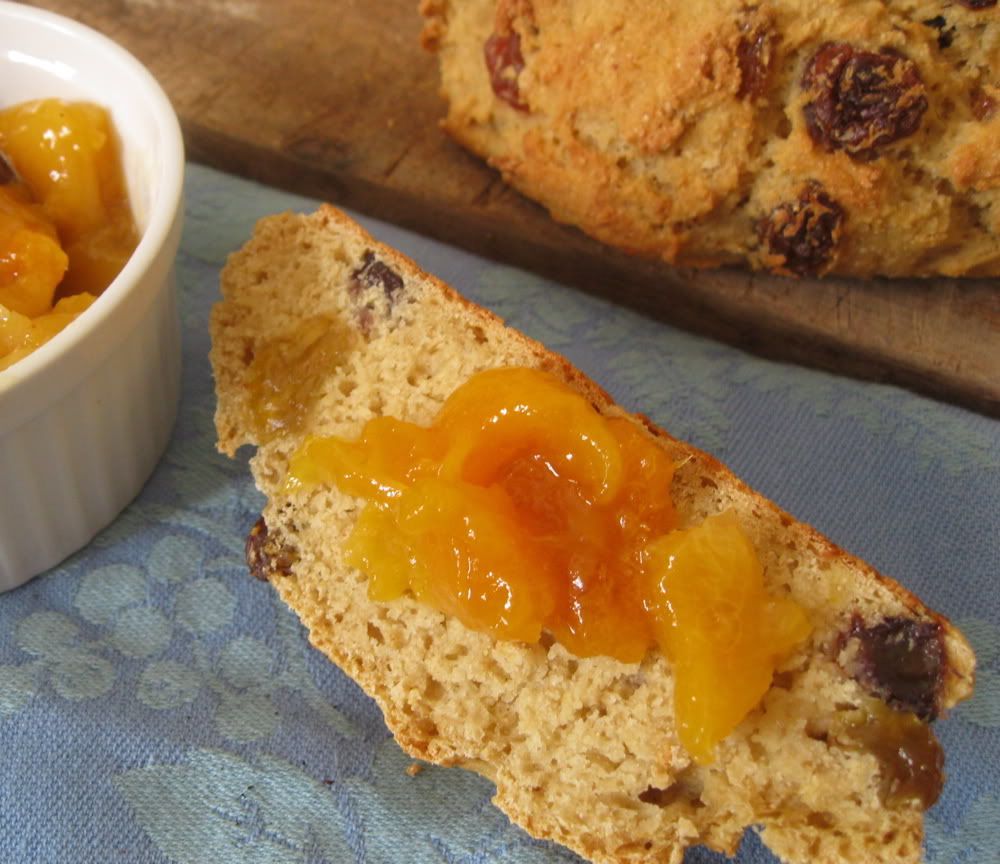
As I flipped through the catalog, pausing as I always do in the bakery section, I was inspired by Zingerman’s loaf chocolate cherry bread. This most excellent bread is what we bought for special occasions and to take home on family trips. A slice, toasted, is fairly unforgettable.

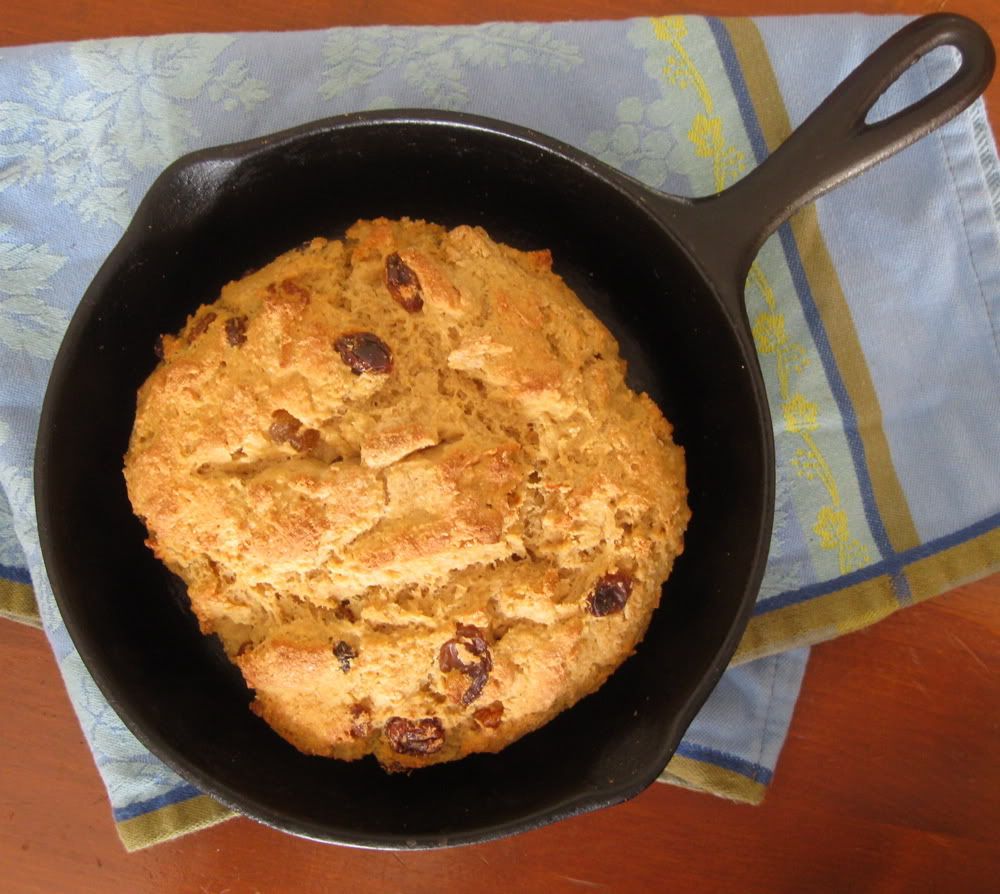
A chocolate cherry version of English muffins turned out to be quite successful, and I’m glad I gave it at try. In the back of my mind, I think I may have baked English muffins before, but it was a long time ago and I don’t really remember how it turned out. This baking project was incredibly easy, thanks to Abby’s expert measurements and detailed instructions.

Chocolate cherry is one of several variations on Abby’s recipe. Visit Abby’s website to see the other #Baketogether contributions.

 Chocolate Cherry English Muffins
adapted from Abby Dodge

Makes 6 really big muffins.

2 1/2 cups all purpose flour + extra for dusting

heaping 1/3 cup cocoa

1 package instant yeast (Rapid Rise or Platinum — I used Platinum.)

2 teaspoons baking powder

1 3/4 teaspoons table salt

2/3 cup water

2/3 cup milk (I used evaporated milk because that’s all I had on hand)

1/4 cup honey
heaping 1/3 cup chocolate chips
heaping 1/3 cup dried cherries
Cornmeal for dusting
2 tablespoons (1 ounce) unsalted butter, at room temperature

Make the dough

1.    In a large bowl of electric stand mixer fitted with a dough hook, combine the flour, cocoa, yeast, baking powder and salt and let this swirl until well blended.
2.   Heat the water and milk until very hot but not boiling. (I accomplished this in the microwave using a Pyrex measuring cup.) Stir in the honey and check the temperature using an instant-read thermometer. For the yeast to activate, the liquids need be between 120°F and 130°F degrees.
3.  With mixer on medium speed, slowly pour the liquid into the flour mixture. Mix until the flour is completely incorporated, scraping down the sides of the bowl once or twice. Increase the speed to medium-high and beat until the dough is smooth and pulls away from the bottom and sides of the bowl, about 10 minutes. Midway through, add the chocolate chips and cherries so they become evenly incorporated throughout the dough.
4.   Scoop up the dough and shape it into a ball, lightly flouring your hands. The dough will be sticky but resist the urge to add too much flour. Lightly grease the bottom and sides of the mixing bowl and pop the dough, rounded side up, back into the bowl. Cover the top securely with plastic wrap or a plate.  Let the covered dough rise in a warm spot until doubled in size, about 45 to 60 minutes. (I made this the night before after the first rise, I deflated the dough, covered it with plastic wrap, and stashed in the refrigerator.)
5.   Sprinkle an even layer of cornmeal over a cookie sheet or half sheet pan. Turn the dough out onto a very lightly floured work surface (the dough is sticky but use the least amount of flour as possible) and gently press to deflate. Using a bench scraper or knife, divide the dough into 6 even pieces (about 4 1/2 ounces each).  Shape the dough into a round balls (about the size of a blood orange) making sure the top is smooth and there is one seam on the bottom. Again, use very little flour. Arrange about 2-inches apart on the cornmeal-lined baking sheet and gently press down on each, lightly flouring your hands as needed, until they are about 3-inches in diameter and about 1 inch thick.  Lightly spray the tops of the dough with canola oil or Pam, cover loosely but completely with plastic or a large rectangular pan ( I used a ceramic baking dish) and let the dough rise, in a warm spot until doubled in size, about 25 to 40 minutes.
Cook the muffins

6.   Position a griddle on the stovetop (I use a double sized one set over two burners). Heat over medium heat. Brush or spread the butter evenly over the griddle (it will sizzle). Carefully lift the muffins, one at a time, and gently place, cornmeal side down, on the hot griddle, about 2-inches apart, so as not to deflate the dough. Reduce the heat to medium-low and cook until the bottom is well browned (reduce the heat if they are browning too quickly) and the sides look dull and a bit dry, about 10 minutes. Using a metal spatula, carefully turn the muffins over, reduce the heat to low, and continue to cook until the bottom is browned and the muffins sound hollow when gently tapped,  about 10 to 15 minutes.
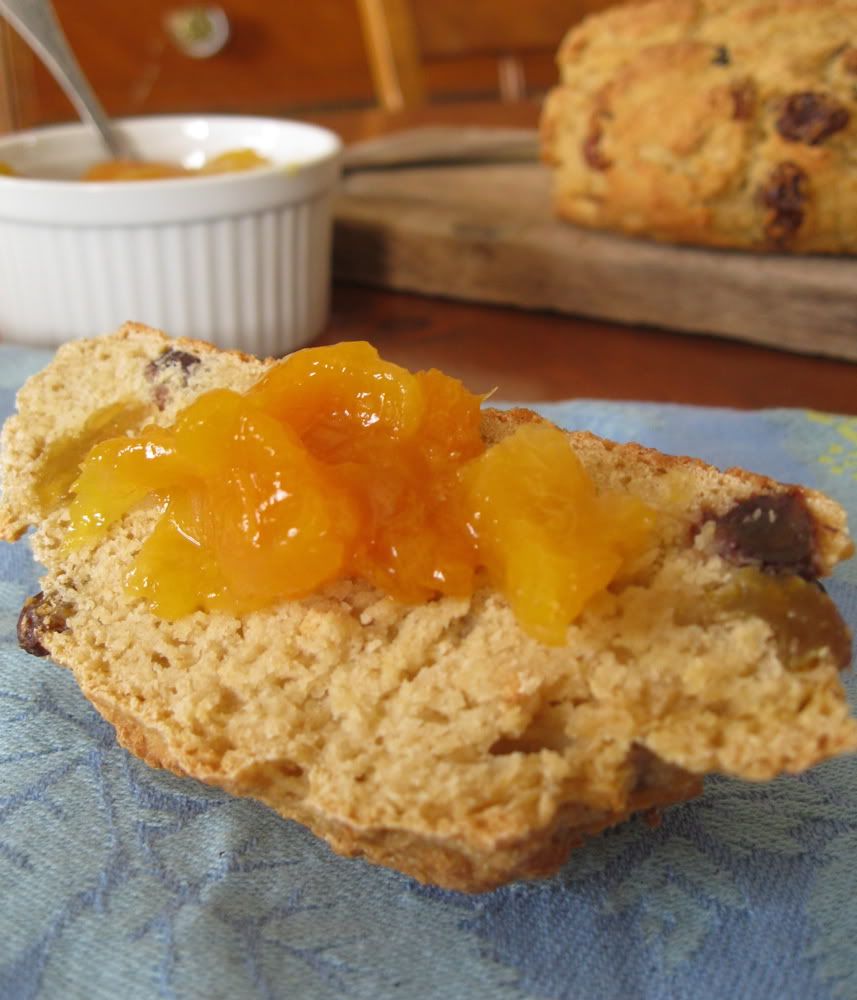
7.   Remove the muffins from the griddle and set them on a wire rack and let cool until warm or cool completely before stowing in an air tight container for up to 3 days (they also freeze nicely). The muffins are best when served toasted. Using a fork (you can use a serrated knife but your muffin will lose is crumble-topped texture), split the muffins in half, toast and serve immediately with butter, jam, honey or nut butter.

Friday, September 28, 2012

Peachy Apricot Hand Tarts with Brown Butter Crust for #baketogether

Peachy Apricot Hand Tarts in a Brown Butter Pastry

Every time I bake with browned butter, I ask myself, “Why don’t I do this more often?” The kitchen smells warm and enticing for hours, and the resulting baked goods have that pronounced buttery flavor.

I am so excited about this pastry dough that Abby Dodge created for the hand tarts in September's #baketogether. For one, it’s full of flavor, the browned butter and brown sugar lending a butterscotch note that is the perfect match for the jammy peach apricot filling I used.

The texture veers close to cookie domain, tender instead of flaky, but not quite as crumbly as a cookie. If you are a baker for who finds flaky pastry somewhat elusive, you might like to try this recipe.

What makes it easy is that, instead of working with freezer-cold chunks of butter, you start with the melted browned butter and from there add the rest of the ingredients. Again, more like a cookie dough than the usual pie crust techniques. (I like this dough so much that I already have ideas for how to use it in other recipes. Stay tuned.)


Tuesday, September 4, 2012

TWD: Nectarine Chiffon Upside Down Cake

Nectarine Chiffon Upside Down Cake from Baking with Julia

Upside down cakes have always been a favorite. I love how the fruit slumps and softens under the weight of cake batter, growing sweeter and more luscious as it bakes in butter and sugar.

I was intrigued by this Baking with Julia recipe for Nectarine Chiffon Upside Down  Cake because it involves a pillowy soft chiffon cake as opposed to the sturdier butter cake that is more commonly seen. It also features a ripple of almond streusel, a very tasty one, I might add, because I’m not generally a streusel fan. This streusel recipe might replace all others in future dishes.

While the recipe calls for a lemon scented cake batter, I used orange juice instead, along with a little bit of pure orange extract. The sweet orange flavor complements the cooked nectarines, buttery brown sugar and cinnamon streusel.

Ideally, this cake should not fall in the middle. As you can see in the photo, mine fell. I fear this was from a too-moist batter caused by too many eggs. Somewhere along the way, I lost track of how many eggs I used and may have accidentally used one more than necessary. It would be easier to keep track of how many eggs are used if I didn’t keep stashing the used eggshells back in the carton. True confessions.

Looks aside, the cake tasted very good, if a tad too sweet, but that’s a personal preference. I might cut back on some of the brown sugar in the fruit layer next time. Still, it’s a delicate and dressed up dessert, perfect to bridge late summer fruit on the way to autumn spices.
 
Every two weeks, a group of bloggers cook from Baking with Julia by Dorie Greenspan. Today’s Nectarine Chiffon Upside Down Cake recipe is hosted by Marlise at Double Trouble and by Susan of The Little French Bakery. Visit their sites to get the recipes. To find links to all the participating bloggers, visit Tuesdays with Dorie.


Friday, August 31, 2012

Savory Panna Cotta for #Baketogether

Goat Cheese and Green Chile Panna Cotta with Tomato-Peach Sauce
If you read blogs with any frequency, you might get the mistaken — very mistaken — idea that cooks who blog never make mistakes and every meal must be extraordinary. And I admit that since starting this blog a little more than one year ago, I’ve only presented the successes.

There’ve been plenty of failures but I didn’t think they were worth photographing much less writing about. You never saw the rye crust pizza that was leaden heavy on the pan and in our stomachs, nor the endless stream of whole grain, low-sugar chocolate chip cookies that I still call works in progress because I’m not ready to call it quits. There’ve been plenty of Experiments and abject failures.

So, yes, there was some reluctance about presenting this #Baketogether recipe because it did not turn out as I had envisioned. But the point of this monthly baking group led by Abby Dodge is not to showcase kitchen prowess. Rather, it has grown into a community where we develop our skills, share ideas, be creative and encourage each other. Participating has been one of the most enjoyable parts of my blogging life. Returning to the working world means I have less time for baking and blogging and I miss this little corner of cyberspace.

And now about the recipe. Abby’s August feature is a gorgeous Ricotta Panna Cotta with Colorful “Brezza Fresca,” (a spritsy sauce of ginned raspberries). Just the notion of gin with raspberries is excitement enough.

I thought a lot about what how I would approach Abby’s recipe and all of those recipes were most definitely sweet. Then one day my mind got stuck on a savory path when I saw a load of Hatch chiles at the supermarket. Roasted chiles, goat cheese and ricotta would form the base. For color and contrasting flavor, a fresh tomato-peach sauce with a little white wine. I know; it sounds fabulous and is pure summertime.

The result was a bit “meh.” I think something other than ricotta would have been better — mascarpone, cream cheese, half and half. More salt. As for texture, mine did not set up well, and part of that is because I used agar-agar, a vegetarian alternative to gelatin. I followed directions which said to treat agar-agar as you would gelatin. I think maybe I should not have used that 1/4 cup of water in the recipe. Or may I should have used gelatin and not tried to experiment.

The tomato-peach sauce I whipped up very quickly, basically using equal quantities of both fruits, salting to taste and splashing in a fruity white wine for dimension. The color of the sauce was what bothered me. All I had were white peaches and they dulled the sauce. Regular peachy peaches would have made a prettier color.

If you’ve never had tomatoes and peaches together, I urge you to try them and check out my Tomato-Peach Jam from last summer.

So, no, I wasn’t crazy about the result of my experiment, but I didn’t let it go to waste. Instead of serving this as an appetizer, which had been my plan, I placed it alongside our supper of scrambled eggs, refried beans and corn tortillas.

My husband asked “What is this?” as he took a bite.

“Oh, just something I made for my blog,” I mumbled, “but it didn’t really turn out.”


Tuesday, August 21, 2012

Popovers for Tuesdays with Dorie

Popovers hot from the oven, a recipe from Baking with Julia.

I love proportional recipes that can be altered without the need for higher math, or calculators or digital scales or scratching out division in the margins of your cookbook.

Take these popovers from Baking with Julia. The amounts of milk, eggs and flour are easily divided by three, thus allowing me to make 2/3 batch. One-third of the recipe would not yield enough while the full recipe would have required more muffin tins than I had available. Perfect.

I cannot remember the last time I baked your classic, everyday individual popovers. Usually I make one huge recipe in my cast iron skillet, pouring the batter over about one pound of sautéed mushrooms seasoned with thyme and garlic. After about 45 minutes, an impressive crown has risen and the batter has sealed tightly around the mushrooms, and it’s quite a sight to see, not to mention a delight to consume.

Tonight’s popovers, though, are plain and simple, ready for whatever adornment you can imagine. A little peach or strawberry jam, or some lemon curd (made with a proportional recipe, too, as a matter of fact).

Every two weeks, a group of bloggers cook from Baking with Julia by Dorie Greenspan. Today’s popover recipe is hosted by Paula at Vintage Kitchen Notes and by Amy of Bake with Amy. Visit their sites to get the recipes. Be sure to check out blogs from other participating bakers at Tuesdays with Dorie.


Tuesday, July 31, 2012

TWD: Blueberry and Nectarine Pie from Baking with Julia

Blueberry Nectarine Pie
Blueberries and nectarines harmonize in this tasty pie from Baking with Julia. There's just enough sweet and tart, and it reminds you of why the best wines and perfumes involve multiple notes. In fact, I think this combination improves a straight-up blueberry pie. (A plain peach or nectarine pie, though, is perfect on its own.)

My only suggested modification for this pie is to add some powdered instant tapioca to the filling. I don't like a runny pie filling and this one ran just a little bit. That's merely an aesthetic issue. The flavor was outstanding.


Every two weeks, a group of bloggers cook from Baking with Julia by Dorie Greenspan. Today's pie is hosted by Liz at That Skinny Chick Can Bake and by Hillary of Manchego Kitchen. Visit their blogs to get the recipes, and check out blogs by the rest of the gang at Tuesdays with Dorie.


Tuesday, July 17, 2012

From Tuesdays with Dorie: Semolina Loaf

Semolina boule and kamut loaf from a Baking with Julia recipe.

My yeast bread history is mostly confined recipes that call for one or two risings. These two loaves were risen three times: First the sponge, then the dough, then the shaped loaf, all rose two hours each time.

The story behind these two loaves is that I discovered there was no semolina flour in my pantry. I am a re-user of containers but I am not good at labeling. As I dug through old whey protein canisters, looking for the semolina, I remembered that just a few weeks ago I'd been digging for something else when I came across the semolina but at the time could not remember what it was. And so I threw it out.

The last time I used semolina was to bake pizza and I'd had to purchase it down in Iowa City because I couldn't find it in Cedar Rapids. I wasn't about to drive 30 miles one way just to get semolina, so I punted. There was kamut flour in the pantry, which just so happened to be in a labeled container. The oval loaf you see in the photos is made with kamut.

After baking the first loaf, I did go to the grocery story for weekly shopping and discovered semolina which I can tell you was not there last fall when I searched high and low. I brought home a bag and baked a second loaf, this time forming it as a boule and using scissors to slice a pattern in the dough before baking.

The kamut loaf was half eaten by the time I took photos. That slather of buttercream occurred when I arrived home today from work and needed a snack before exercising. The leftover icing called my name.

This was an easy recipe to follow, but 2 teaspoons of salt is too much. I cut down to 1 teaspoon in the semolina version.

I give them a so-so review. The loaves did not have the complex flavor and chewiness of a really long risen sourdough, nor was there the fresh yeasty presence of a short risen loaf.  But you know, even just OK homemade bread beats anything commercial. I know every ingredient that went into these loaves: flour, water, yeast, olive oil, salt.

I appreciated the experience because it adds confidence to my baking. I'm looking forward to trying some of the country French loaves down the line with their multiple risings over a couple days.

If you'd like to try this Baking with Julia recipe, you'll find it at today's hosts: Anna of Keep it Luce and Renee of The Way to My Family's Heart. To seek the works of all participating Tuesdays with Dorie bakers, visit the site here.


Tuesday, July 3, 2012

TWD: Toasted Almond Biscotti

Toasted Almond Biscotti
Biscotti are fun to make because there’s always that little bit of worry that the nicely firm logs you just baked are going to shatter as you slice them. Sturdy cookies, they always hold up just fine.

Slicing posed no problem for today’s Tuesdays with Dorie treats. I made mine with almonds instead of the hazelnuts called for in the recipe and adjusted the flavoring a bit. I tend to prefer almonds over hazelnuts and just happened to have a 5 pound bag of them from a recent bulk order.

The real adventure in preparing this recipe was blanching the almonds. I’ve never done that before. I usually purchase blanched nuts (expensive) or use plain almonds in their skins (rustic and/or lazy).

Blanching was super easy. You just boil the nuts a few minutes in water to which has been added some baking soda. The water will turn black, but do not be afraid. Drain and rinse the nuts in cold water, then put them in a tea towel and rub. The skins come off with little effort at all. Easy as can be.

These blanched almonds are then toasted in the oven for about 15 minutes to bring our the wonderful flavor. Cool, chop and proceed with your recipe.

Other modifications I made include using 1 teaspoon of almond extract instead of brandy, and cutting back on the sugar by a few tablespoons. The recipe does not call for a chocolate garnish, but I love chocolate dipped biscotti — especially when the coating melts into a cup of hot coffee.  To coat my biscotti, I melted white chocolate with a bit of heavy cream and almond extract. I added a dark chocolate drizzle for contrast.

To get the recipe, visit our two hosts for today: Jodi of Homemade and Wholesome and Katrina of Baking and Boys. Visit again in two weeks for the next recipe from Baking with Julia.


Monday, June 25, 2012

Tart Cherry Tartlets with Frangipane Filling for #Baketogether

Tart Cherry Tartlets with Frangipane Filling for #Baketogether

These warm June days have me thinking of Michigan cherries, which inspired my #Baketogether recipe, Tart Cherry Tartlets with Frangipane.

This is my second summer without fresh tart cherries. When we lived in southwest Michigan, June brought an exciting abundance of fruit. I always felt slightly giddy-anxious as I raced against time to prepare favorite recipes before each fruit’s all-too-short season played out.

In early June (and late May), there were strawberries. Following quickly were cherries, tart and sweet, gone too fast. Then blueberries, apricots, peaches, plums and apples.

Getting my hands on fresh, locally grown tart cherries was a thrill, because I’d never had access to them in other states where I’d lived. I still remember the first precious quarts of pie cherries I brought home and how I stood over the sink pitting them first with a bobby pin and then resorting to my thumbs. I remember thinking those raw cherries tasted pretty dull. It takes sugar and heat to reveal the cherry flavor we know and love.


Of course I’m not the only person missing Michigan cherries. The weird weather this past winter and spring damaged the cherry crop in the Mitten State. It’s so tough up in Glen Arbor, MI that the good folks at Cherry Republic — a cool retail and mailorder operation for all things cherry — have had to outsource some cherries from Poland.

I haven’t found fresh tart cherries here in Iowa, but it’s not for lack of trying. I did find frozen fruit, though if you can find fresh ones, please do use them.

Cherries and almond love each other and I love them, too, so I made a frangipane filling. Abby’s crust I changed to use half rye flour because Kim Boyce uses rye in her piecrusts and I like the slightly sweet note that results. Other than that, I followed it to the letter. The pastry was easy to handle and I enjoyed it.


Thanks, Abby, for another great recipe. Here’s to better days for cherry growers and cherry lovers.

Tart Cherry Tartlets with Frangipane
adapted from Abby Dodge

For the dough:
2/3 cups (6 ounces) all-purpose flour
2/3 cups (6 ounces) rye flour

1 tablespoon granulated sugar

1/2 teaspoon table salt
6 tablespoons (3 ounces) unsalted butter, cut into 6 slices, well chilled

2 tablespoons (1 ounce) vegetable shortening, cut into 2 slices, well chilled
2 tablespoons + 1 teaspoon very cold water

2 teaspoons freshly squeezed lemon juice
For the frangipane filling
:
1 cup almond flour

1/2 cup granulated sugar

2 eggs
2 tablespoons butter

1 teaspoon almond extract

For the cherries:
8 ounces fresh or frozen (and thawed) tart cherries
1/2 to 2/3 cup granulated sugar
Make the dough:
1. Put the flours, sugar and salt in a food processor and pulse briefly to combine. Add the butter and shortening and pulse until the butter and shortening pieces are slightly larger than pea size, about 10 to 12 pulses depending on your machine. Drizzle the water and lemon juice evenly over the flour mixture. Pulse until the dough begins to form moist crumbs that are just beginning to clump together, about 8 or 9 more pulses depending on your machine.
2. Dump the moist crumbs onto a large piece of plastic wrap and gather into a pile. With the heel of your hand, push and gently smear the dough away from you until the crumbs come together, using the fraisage technique.  Shape into a 5-inch disc and wrap tightly in the plastic wrap and refrigerate until firm, about 2 hours, or up to 2 days.
Line the tart pans
:
1. Position an oven rack in the lower third of the oven and heat the oven to 375°F. Lightly grease ten regular-sized (2 3/4 to 3 inch diameter) muffin cups.
2. Set the wrapped, chilled dough on the counter at room temperature until it’s pliable enough to roll, 10 to 20 minutes (depending on your kitchen temp and the weather). Arrange a large piece of plastic wrap or parchment on the work surface and put the dough in the center. Cover with another piece of plastic or parchment and press down on the dough to flatten. Using a rolling pin, roll the dough between the plastic or parchment to about 1/8- inch thickness, turning, lifting and repositioning the plastic or parchment and lightly flouring throughout the rolling.  Using a 3 1/2-inch round cookie cutter, cut out 8 rounds. Gather up the scraps, re-roll to a 1/8-inch thickness, and cut another round. Re-roll and cut one more round for a total of 10 rounds of dough.
3. Working with one round at a time, use your fingers to gently press the dough into a prepared muffin cup, making sure there are no air bubbles in the bottom and the dough is pressed firmly and evenly up the side to within 1/8 inch of the top of the cup. Repeat with the remaining dough rounds. If your kitchen is hot, slide the muffin tins into the refrigerator while you make the filling.
Make the fillings and bake the tarts
:
1. Place the cherries in a small saucepan and stir in the sugar. Turn on the heat and cook slowly for about 15 minutes, until the sugar melts and the cherry juices start to thicken a bit. Remove from the stove and let cool.
2. Put the almond flour, sugar, eggs and almond extract in a bowl. Mix well with a whisk until the eggs are well incorporated.
3. Using a slotted spoon, take out five or six cherries (or one heaping tablespoon of cherries) and fill each tartlet with this amount. Then spoon some of the frangipane mixture to cover. It’s OK to mound it slightly. Bake until the filling swells and turns a golden brown, about 40 minutes. Move the muffin tin to a wire rack. Using a paring knife, run the blade between the crust and the pan to loosen the tarts from any sticky berry juices and let cool for 10 minutes. Using a thin, metal spatula or the paring knife, carefully remove the tarts from the muffin cups and set them on a wire rack. Serve warm or at room temperature.


Tuesday, June 5, 2012

TWD: Oasis Naan with Coriander, Dill and Black Salt from Baking with Julia


Oasis naan with coriander, dill and black salt.

Today’s Tuesdays with Dorie recipe is Oasis Naan, a Persian style flatbread.

It does look a little bit pizza like and the recipe itself is pretty similar to some pizza crusts I’ve made.

I adapted the recipe to use half whole-wheat flour. I also skipped the cumin seeds as called for and made two versions of my own, both with Middle-Eastern influences. In one of them, I used fennel seeds and preserved lemon, while the other had ground coriander, dill and coarse black salt.

These were quick to make, about 2 1/2 hours from start to finish. The dough was easy to handle, but I didn’t think the bread’s flavor was all that remarkable. While a longer rise would result in a more flavorful bread, this recipe will certainly suffice on those occasions when you want something quick, homemade and yeasty.

Be sure to visit the blogs Always Add More Butter and Of Cabbages and King Cake, which are hosting today’s recipe.

Before baking, with coriander, dill and black salt.


Thursday, May 31, 2012

Cornmeal Muffins with Three Lemony Herbs for #Baketogether

Lemon verbena, lemon thyme and lemon mint flavor these cornmeal muffins.
Sometimes, well, most of the time, I don’t like picking sides. That’s why these cornmeal muffins with three lemony herbs can walk the fine line between sweet and savory.

Abby posted her recipe for May’s #baketogether event, giving us two versions from which to choose. I tweaked the recipe just a little bit, kept a bit of sugar and used three fresh herbs — lemon verbena, lemon thyme and lemon  mint — that work well for any time of day.

For a sweet course, I’d serve these warm, sliced and topped with a strawberry sauce, a bit like shortcake, with some whipped cream on the side. For teatime: Warmed with a slather of butter, maybe a drizzle of honey.

In savory situations, put one of these muffins alongside a salad, perhaps making little crouton. I placed a small knob of goat cheese atop some of the muffins before they went into the oven. Goat cheese and lemony flavors are very compatible.


From left: Lemon verbena, lemon thyme and lemon mint.

My first tweak of Abby’s recipe juggles the ratio of flour to cornmeal. My family’s cornbread traditions have never involved wheat flour, only cornmeal, which means it’s a pretty sturdy bread. I kept the all purpose flour, just used a little less of it and a tad more cornmeal.


Tuesday, May 15, 2012

TWD: Pecan Sticky Buns from Baking with Julia

Nancy Silverton’s Pecan Sticky Buns from Baking with Julia
When Dorie Greenspan described these pastries as the “ne plus ultra of sticky bundom,” indeed she was correct. Chances are, you’ve never tasted sticky buns like these.

Nancy Silverton’s recipe makes the the fluffiest sticky buns you’ll ever see. They were downright pillowy, a lovely thing to behold, the stuff that makes a cook exceedingly proud of her accomplishments.

And as pretty as these are, and as fun as they were to make, I was underwhelmed. Yes, technically I was very pleased with the outcome, but not thrilled with the end result.

These sticky buns had a little too much something-something.


I know that for me to say something is too much is a little out of character because I like bold flavors and certainly wear too many accessories and tend to overdress no matter what the occasion and cannot help but dream of big hair.

To me, it is gilding the lily to turn a rich and buttery brioche dough into sticky buns.

I held back for the same reason years ago when it was trendy to use croissants in bread pudding. I prefer sticky buns and cinnamon rolls made with dough that is only slightly sweet. For me, it is the contrast of cinnamon filling, the caramel sauce and rather plainish dough that makes sticky buns so yummy.

And as for brioche, well, I’d rather you give me a big warm loaf with a nice top knot and let me go off into a corner to enjoy it by myself with maybe just a cup of good, dark coffee to finish. Brioche, when it’s done well, needs nothing else.

My husband, however, did not think this recipe gilded the lily, or if he did, he saw no problem with it (and he isn’t even Southern). He loved these sticky buns. It was a special luxury for us to tuck into them at 9:45 on a work night. (I did sleep very well after a sticky bun nightcap.)

Now, as to the technical aspects of the recipe, I have no complaints at all. Everything worked beautifully. The recipe was fun and easy to execute, not at all complicated. If you’d like to see the recipe and make these buns for yourself, visit the host blogs of Lynn at Eat Drink Man Woman Dogs Cat and Nicole at Cookies on Friday.


Tuesday, May 1, 2012

TWD From Baking with Julia: Hungarian Shortbread with Cherry Preserves

Hungarian Shortbread from the book Baking with Julia
A few years ago, one of my husband’s many cousins — this one on his mother’s side of the family — discovered Great Grandfather’s naturalization papers in an attic trunk. The paper suggested their lineage was Hungarian — not the Slovak they’d always believed.

This caused some vexation over which side to choose.

“We don’t know it’s accurate,” my husband said of the artifact. “People who came through Ellis Island had all kinds of crazy things written on their papers.”

Indeed. We’re pretty sure my husband’s paternal great-grandfather’s Italian surname was considerably longer when he arrived at Ellis Island.

My mother-in-law, for one, does not accept the Hungarian designation. She was told her grandfather was Slovak and that’s how it will remain.

As for this Hungarian Shortbread, well, I suppose it could be Slovak. It doesn’t matter.

All that matters is that butter, sugar and flour bake up into something good, and if you spread a little jam between the layers, so much the better.

This layered shortbread is a recipe from the pastry chef Gayle Gand which appears in Baking with Julia. The recipe directs you to handle the often sticky shortbread dough by freezing it first. Freeze it, then grate it into the pan. Brilliant.

I’ve used this technique to grate butter into flour for making biscuits and pie crusts, but would never have thought to try it here.

This is a flexible recipe that can accommodate a baker’s busy schedule.

Being in somewhat of a hurry (and also being short on butter), I made one quarter of the recipe. The ingredients are easily adjusted into fourths. I used white whole wheat flour, which made me feel healthier, and half raw cane sugar, which contributed a richer flavor.

It’s worth mentioning that I accidentally melted the butter instead of softening it. It wasn’t a problem, especially as the dough was going to be frozen.

Sadly, I did not get to prepare the rhubarb jam called for in the original recipe. Instead, I used a jar of commercially prepared tart cherry preserves, which were a good foil for the sweet dough.

Instead of baking in a sheet pan, I used my mini muffin tin. I put a layer of grated dough in each section, then spooned a small amount of preserves before sprinkling on the final layer of shortbread dough.

Into the oven and out in short order.

Today’s Hungarian Shortbread recipe is being hosted by Lynette of One Small Kitchen and by Cher at The Not So Exciting Adventures of a Dabbler. Visit their blogs to get the recipe. And while you’re at it, take a look at other Tuesdays with Dorie bloggers.

Sunday, April 29, 2012

Recipe for Almond Angel Food Cake with Blackberry Curd for #BakeTogether

Almond  Angel Food Cake with Blackberry Curd

April has been a busy month. I started a new job after more than a year of the housewife life. I enjoyed my little break but it was time to get back into the working world.

It’s a writing post in the fundraising world, something I can feel good about every day. What I did not anticipate was the actual adjustment the job would require. Deciding who would get up first (I do, at 5:30 am, which is drastic to friends who know me well), making sure the rabbit’s morning routine is disrupted as little as possible (he has adjusted beautifully), remembering to pack a lunch.

Where, when and how to fit in exercise (right now it’s after work). And how to sit down to a healthy supper before 8 pm. I haven’t yet figured that out.

I’m trying to carve a sweet and balanced life for my family.  I’ve slowed a bit in posting here, but hope to resume a more regular schedule once I’ve figured out a new rhythm.

Coincidentally, April is the one year anniversary for Dust with Flour. Thank you, dear readers, for visiting and leaving such kind comments along the way. I’d wanted to start a blog for many years but the workaday life was a hurdle. I was definitely baking, but it didn’t get beyond that.


Tuesday, April 17, 2012

TWD: Lemon Loaf Cake from Baking with Julia


Lemon Loaf Cake with Three-Citrus Curd
While I derive a certain thrill from tackling complicated dishes, I never tire of simple recipes that deliver rewards in flavor and reliability.

Meet my new low maintenance friend, this Lemon Loaf Cake from Baking with Julia.

This citrusy loaf bears all the traits we love about pound cake — a fine, even crumb surrounded by a sturdy, tender crust. What I really appreciate is that this impressive richness must’ve been designed with busy cooks in mind.

For one thing, you can mix this beauty in one bowl. No need for a stand mixer. I used a whisk and switched to a spatula at the very end.

Curd made with lemon, lime and blood orange.

Meyer lemon, Persian lime, and Moro orange zests.

Not only will you dirty fewer dishes, but you don’t have to plan too far in advance. For instance, there’s no need to set the butter out to soften. You melt it and then let it cool, which doesn’t take very long at all. The melted butter is added as a final step — which differs from many traditional cake recipes in which softened butter is creamed with either sugar or eggs as a first step.

That one little difference makes me happy. I cannot count the times I’ve started to bake a cake only to realize the butter is still very, very cold.

I followed the recipe as written, except I used the zest from three fruits — Meyer lemon, Persian lime, and Moro orange. While the cake was in the oven, I juiced the fruit and made a lemon, lime and orange curd in the microwave using the super easy recipe Lemon Curd for the Easily Distracted.

And there you have it. A simple but elegant pound cake made with a minimum of fuss.

Today’s Lemon Loaf Cake is being hosted by Truc at Treats and Michelle of The Beauty of Life. Visit their blogs to get the recipe. While you’re at it, visit the sites of other Tuesdays with Dorie bloggers.
 

Tuesday, April 3, 2012

Pizza Rustica with Cheese and Pesto for Tuesdays with Dorie

Pizza Rustica filled with ricotta, mozzarella and pesto

For years I put off making Pizza Rustica, avoiding what I thought was a high maintenance ordeal. I’m not sure where I got that idea because this was one of the easiet pies I’ve ever made, savory or sweet.

I know you’re thinking this doesn’t look like pizza, but this deep-dish, lattice-topped pie is Neapolitan in origin. The fillings might include all cheese, or a combination of meats, or vegetables such as spinach and chard. For my vegetarian household, I omitted the recipe’s proscuitto, and added more mozzarella. I also spread a layer of spinach-basil pesto between the filling.

The pastry crust is pasta frolla — an Italian tradition that calls for flour, butter, sugar and egg. It was a joy to work with — yes, I meant to use that word. Not touchy and overly sensitive. Amiable.

While you might think a savory filling would not work with this slightly sweet crust, trust me, the combination is very tasty. And I think the time is right for such a flavor contrast, what with the popularity of sweet-salty partnerships cropping up in the blogosphere and elsewhere.

I will definitely make this recipe again, experimenting with fillings. I can’t wait to use the pasta frolla in a pie of summer fruit.

This Baking with Julia recipe is from pastry chef and author Nick Malgieri. The recipe is hosted by Emily of Capital Region Dining and Raelynn of The Place They Call Home so go on over there and see how to make your own. Click right here to see the works of 300-some participating Tuesdays with Dorie bakers.


Tuesday, March 20, 2012

TWD: Soda Bread with Kamut Wheat

Irish Soad Bread made with Kamut flour and raisins

Soda bread is fast, foolproof and always rewarding. The pleasure of a slice of plain soda bread all toasty and warm is exceeded only by a slice with butter and jam.

I’ve been making soda bread — traditional as well as gussied up versions — for years. I thought this Baking with Julia recipe by Marion Cunningham was a good time to try a grain that’s new to me: Kamut khorasan wheat.

This is not your typical wheat, but an old-country relative of the everyday variety. Kamut is not the type of wheat, but a registered brand the company says guarantees certain attributes of this special  wheat.

And what are the special attributes? Not only are the grains significantly larger than that of regular wheat, but they carry more nutrients. This is according to plant scientist Robert M. Quinn whose family developed the wheat from a few grains that hitched a ride from Egypt after World War II. If you follow this link to Quinn’s paper, you can read the wheat’s interesting history.

Because Kamut is not particularly high maintenance when it comes to cultivation and thus is quite suitable for sustainable agriculture. It produces a high quality harvest without reliance on chemical fertilizers and pesticides.

As for flavor, it bakes up sweeter than traditional whole wheat flour, which as you know can be a tad bitter. Kamut is said to be more easily digested than common wheat, though it does indeed contain gluten and should not be consumed by persons with celiac disease.

It made a fine soda bread. I followed Marion Cunningham’s recipe, substituting whole Kamut flour for all purpose. I also added a handful of raisins soaked in orange juice.

If you’d like to see the recipe, visit our hosts’ blogs: Cathy of My Culinary Mission and Carla of Chocolate Moosey. Check back on April 3 for the next Tuesdays with Dorie recipe.


Thursday, March 15, 2012

Buckwheat Sablés with Garrotxa Cheese, Thyme and Lemon Zest for #Baketogether

Buckwheat sablés with Garrotxa cheese, thyme, and lemon zest.
 
If it’s possible for a single blog to have a meme, mine would be sablé. In the 11 months since I started this cooking journal, I’ve baked four versions of buttery shortbread cookies.

It wasn’t intentional. It just happened. Memes are like that. You think they come out of nowhere until there’s a pattern in the rear view mirror.

All my sablés, until now, have been on the sweet side. All have used standard unbleached wheat flour. So, when Abby Dodge posted her Spicy Parmesan version for March’s Twitter #baketogether, I got to thinking about variations.

Wanting to change the base, I selected buckwheat. I had some in the pantry, owing to a recent craving for pancakes as a special Friday night supper. Buckwheat is gluten free and this recipe would be a thoughtful way to accommodate friends allergic to gluten.

Garrotxa, an aged goat cheese from Spain.
The Garrotxa cheese came about while browsing the diverse selection at New Pioneer Food Co-op. It is a flavorful aged goat’s milk variety from Spain’s Catalonia region. Creamy white inside, it has a soft and bloomy rind. Garrotxa is rich and tangy enough to pair with earthy buckwheat.

To fill in the flavor gap, I kept the fresh thyme that Abby used. There is a great local herb company, Mariposa, that supplies area supermarkets. I enjoy having fresh thyme, rosemary and basil in the dead of winter.

Tuesday, March 6, 2012

TWD: Rugelach from Baking with Julia

Rugelach in crescent shapes.
A friend recently posted on Facebook that she’d just made eight dozen rugelach. Eight dozen. That’s 96 little cream cheese and butter pastries with a sweet cinnamony filling. My husband, who really, really loves rugelach, caught the news first and told me.

Our friend is Jewish and very pregnant, so the eight dozen pastries are important for her nesting instinct, for her late-term cravings and for providing nourishment to family and guests when the baby comes home.

“Eight dozen,” he said, not really trying to hide his rugelach envy.

He brightened when I said his rugelach dreams would come true in just about two weeks as the Tuesdays with Dorie group baked a recipe from Baking with Julia.

But since that conversation, he has asked me more than once: “Now, when are you making rugelach?” as if to make sure I hadn’t changed my mind. To keep him in the loop, we discussed the recipe and what filling I would use. I prefer chocolate filling, but he insisted on cinnamon, so I followed the recipe and its cinnamon theme.

Rugelach from the book Baking with Julia.

Monday, February 27, 2012

Savory Cheesecake with Chèvre and Gremolata for #baketogether

Savory Cheesecake with Chève and Gremolata

When an idea won’t go away, it’s time to preheat the oven. This Savory Cheesecake with Chévre and Gremolata is a recipe I could not get out of my head.

A ripple of gremolata (lemon, parsley, garlic) runs through the lemony filling, making a fine choice for first course or as a party appetizer.

A ripple runs through it: preserved lemon, sautéed garlic, parsley, and capers.


It’s my second cheesecake for Abby Dodge’s February #baketogether, the first being sweet, with pumpkin and blackberry flavors.

As I considered ways to adapt Abby’s original recipe, I wanted to use ingredients that I keep on hand so the recipe would become one that I could turn to without much effort. I kept thinking of that jar of preserved Meyer lemon and its lively citrus flavor and how nicely it would complement the tangy goat cheese.

And I thought of parsley for color and flavor. If we don’t have parsley on hand, things get ugly. It’s the primary component of a happy and healthy house rabbit’s diet. We go through a lot of parsley here.


Related Posts Plugin for WordPress, Blogger...